Book That Gig Audition Course - Lesson 3
The Self Tape Audition Process
Skip the live audition and do a recorded self-tape!
“You cannot try to get the job. Just go in there, have some fun, and do your version of that part. This is what I’m selling. If you want to buy it, that’s cool. Have some adjustments for me? That’s fine, I’ll make some adjustments, but this is basically what I want to do. That’s the attitude… —Sam Rockwell

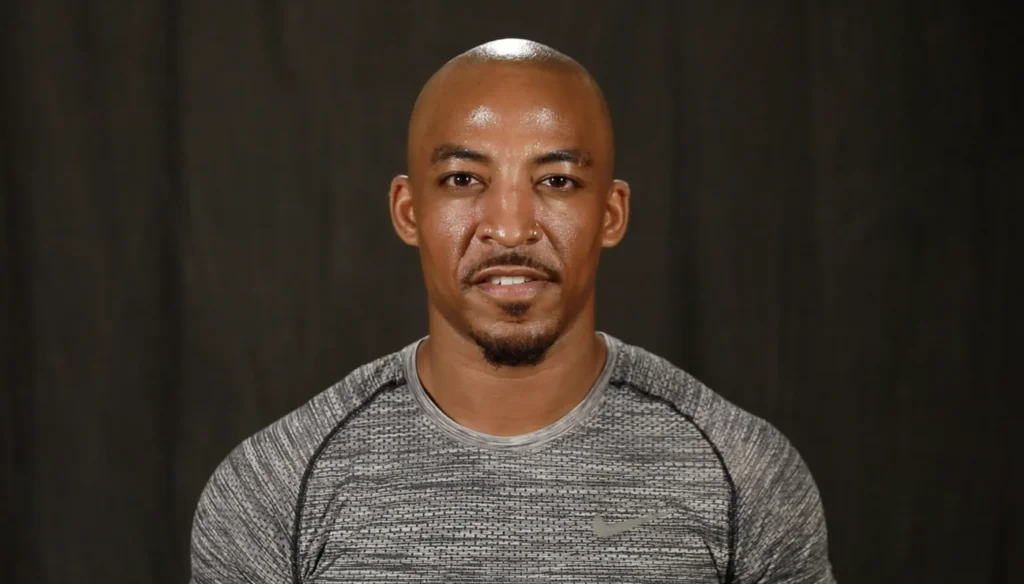
A self-tape audition is a way for actors to audition for roles remotely, without having to physically attend a casting session. It has become a standard practice in the entertainment industry, allowing actors from different locations to audition for roles without the need for extensive travel. Here’s a detailed description of the process! Since we covered general audition technique in the previous lessons, we won’t be getting too specific on the performance. Instead, we will be looking at the details specific to recording and submitting your own audition on video.
Audition for a role anywhere in the world!
1. Receive the Audition Notice
Before we cover what to do in a self-tape audition, you have to first GET an audition. Getting an audition opportunity as an actor requires a bunch of work beforehand to get to the self-tape. We covered these steps in the first lesson. But as a reminder, they are…
- Actor Training and Skill Development: Develop your acting skills!
- Create a Strong Portfolio: Headshot, Resume, and Reel!
- Get an Agent or Manager: Someone to help you find roles that you don’t know about.
- Networking: Get yourself out there!
- Union or Non-Union? Join the union if you feel like it is right for you.
Audition Websites and Casting Calls:
Use online platforms to find auditions. Here are some sites:
- www.Backstage.com
- www.CastingNetworks.com
- www.CastingWorkbook.com
- www.ActorsAccess.com
- www.Mandy.com
- www.NYcastings.com
- www.CentralCasting.com for background and extras
Stay Informed:
Keep your ear to the ground and be aware of projects in your area!
Be Persistent and Resilient:
Don’t quit! Keep Auditioning! You will make it!
You typically receive an audition notice from your agent, manager, or casting director. The notice includes key information about the role, such as the character description, scene(s) to be performed (sides), technical requirements for the self-tape, deadline, and submission instructions.
Remember that getting auditions is a competitive process, and success may take time. Consistency, perseverance, and continuous improvement in your craft are essential to increasing your chances of landing auditions and eventually booking roles.
So now that you have done the preparation for your audition, that amazing email arrives to say, “Congratulations, you have been selected to audition for the <whatever> role! Here are the details.” Check your schedule and confirm your ability to prepare, record, and submit your self-tape audition. Confirm that you have accepted the audition opportunity and THANK THEM!
Now it’s time to get to work recording an audition that will Book The Gig.
2. Prepare your Character for the Audition
Now that you have been selected for an audition.
Review the sides to understand the character, context, and dialogue. Research the project and consider the tone, genre, and style. Make decisions about how you’ll approach the character and interpret the script.
Memorize the Sides: Learn your lines but stay flexible to allow for natural delivery and in-the-moment adjustments.
Explore Different Choices: Experiment with different interpretations of the scene. Consider varying emotions, pacing, and energy to find what feels most authentic.
Rehearse with a Reader: Practice with someone who can read the other character’s lines, helping you build a natural rhythm and chemistry.
3. Setup your recording space
Choose the Right Space:
Quiet Environment: Select a quiet room away from external noises (traffic, household activities, etc.).
Control Sound: Ensure there is minimal echo. Use carpets, curtains, or foam panels to dampen sound.
Backdrop:
Solid Color: A solid colored wall in your home will work fine as well, but make sure that there is nothing on the wall like pictures or anything else that draws attention away from you.
If you don’t have a plain empty wall, a solid-colored backdrop will be great. Blue or gray are often recommended as they don’t distract from your performance. Backdrops are nice as they can be taking down and don’t require a dedicated space in your home. Here are some backdrop options and ways to hold/hang them.
Evenly Lit: Make sure the background is well-lit and free of shadows.

Lighting
Good lighting is super important in recording your self-tape audition. They need to see you well, not be distracted, and be focused only on you. Good lighting will help create a better video that is less grainy and easy to watch. Think Goldilocks here. Not too bright, not too dark. Just right.
Use a three-point lighting setup to evenly illuminate your face and minimize shadows.
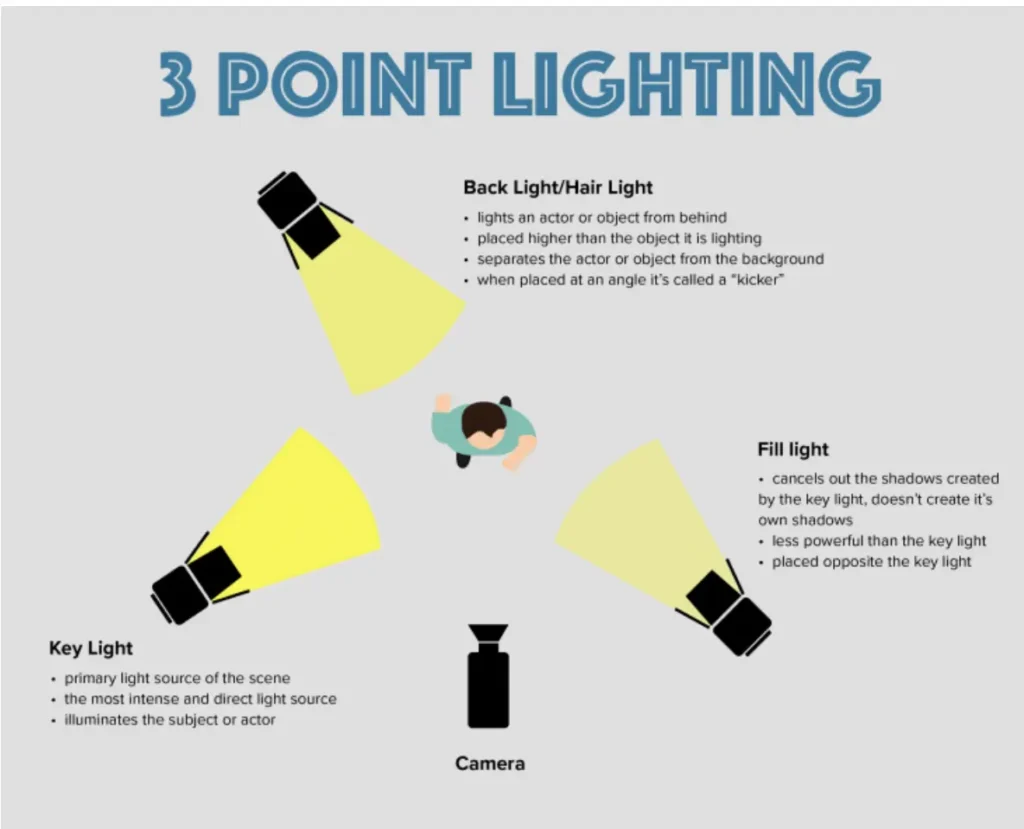
This includes:
Key Light: The main light source, positioned in front of you.
Fill Light: Placed on the opposite side to fill in shadows.
Back Light: Positioned behind you to separate you from the background.
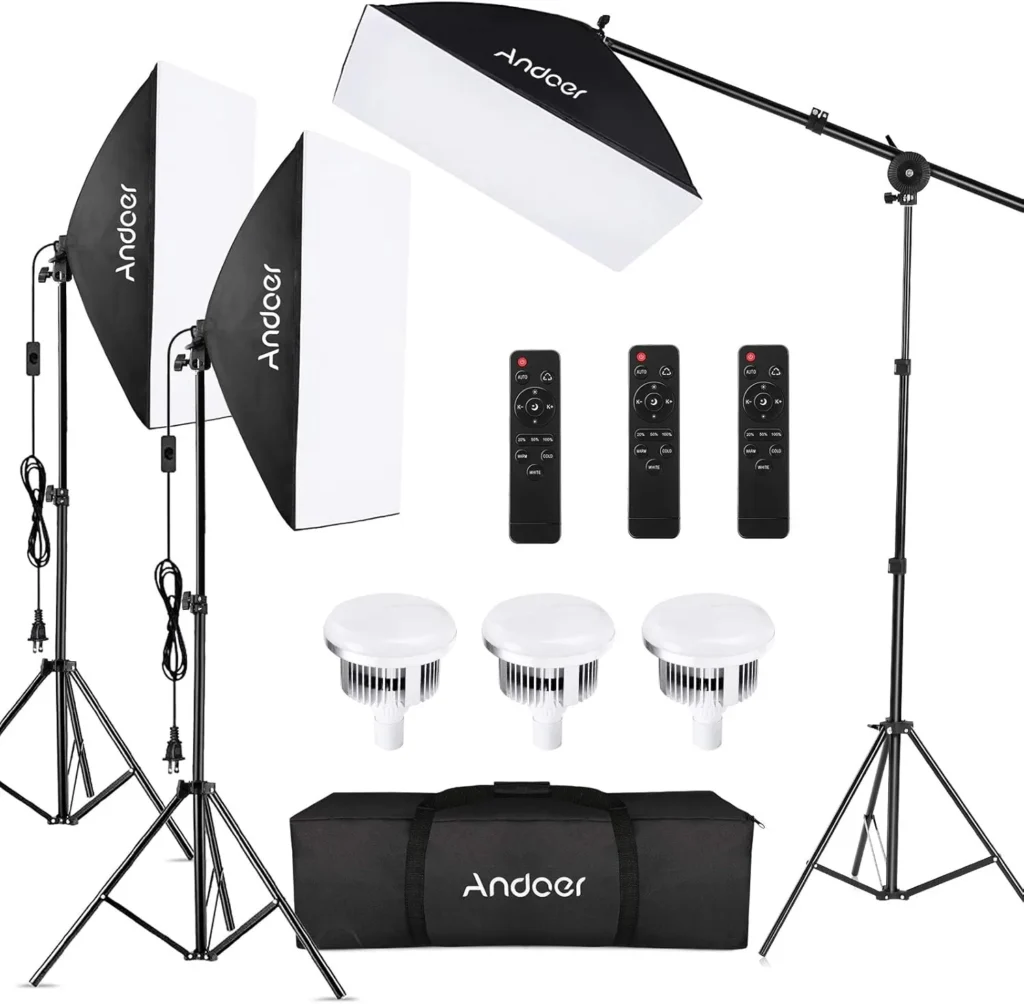
You can use lights from your home or buy dedicated photo/video lights that will produce a much better result. Some basic lighting kits are below.
Natural Light: Alternatively, you can use natural light from windows, but ensure it is diffused to avoid harsh shadows.
Camera and Equipment
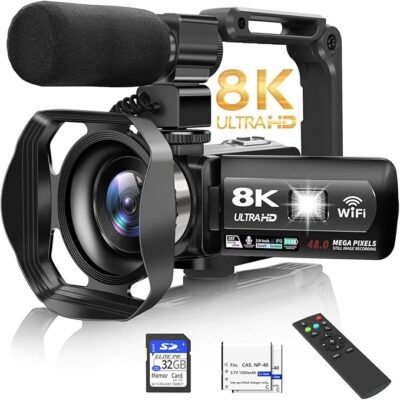
Quality Camera: Use a good quality camera. A modern smartphone will work as well as a DSLR or camcorder. Purchase Camcorder
-Settings: It is preferable to record in HD which is 1920×1080 – 30 fps (frames per second). Shooting in 4K is not necessary and will create video files that are too big to send or upload.
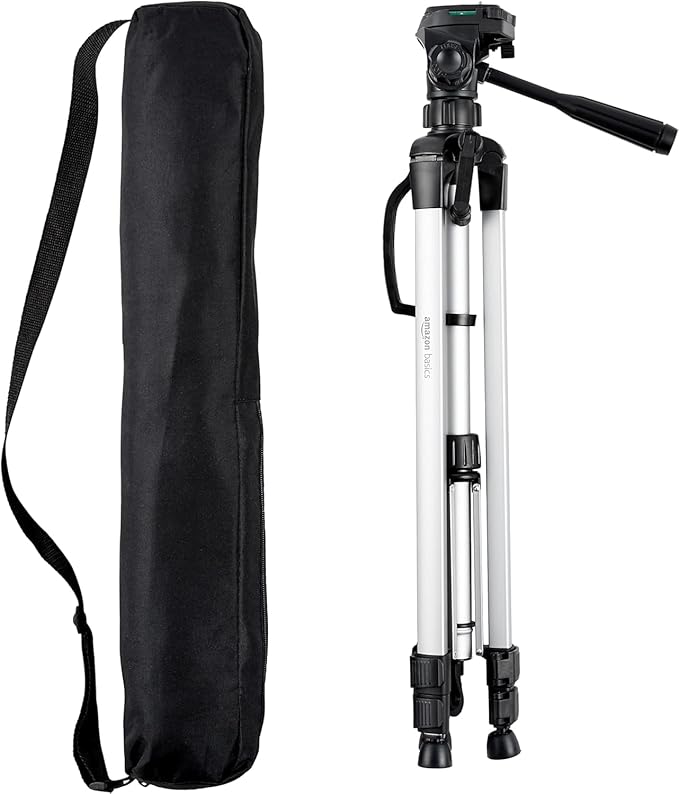
Tripod
Use a tripod to keep the camera steady at eye level.
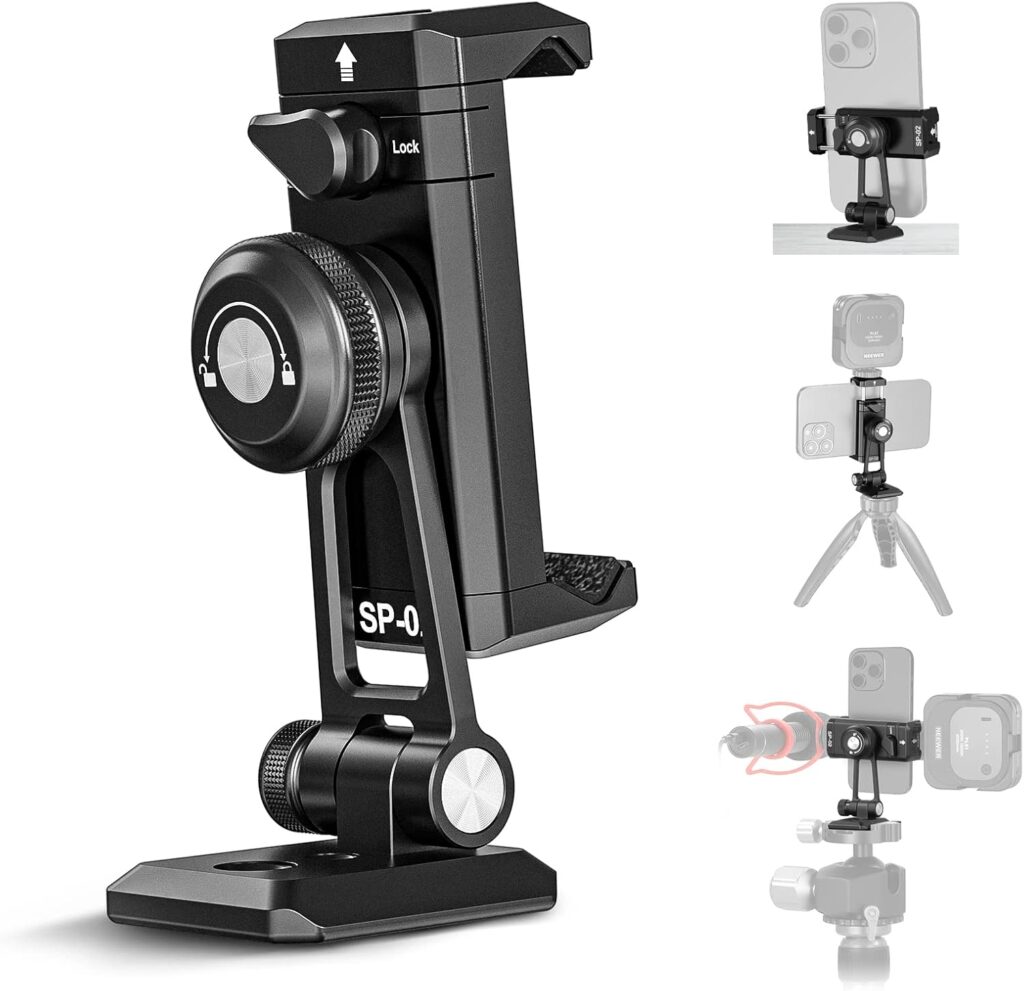
Cell Phone Mount
If you are using your cell phone, purchase a mount to hold your phone on the tripod. Avoid propping your phone up against something. It will not look good.
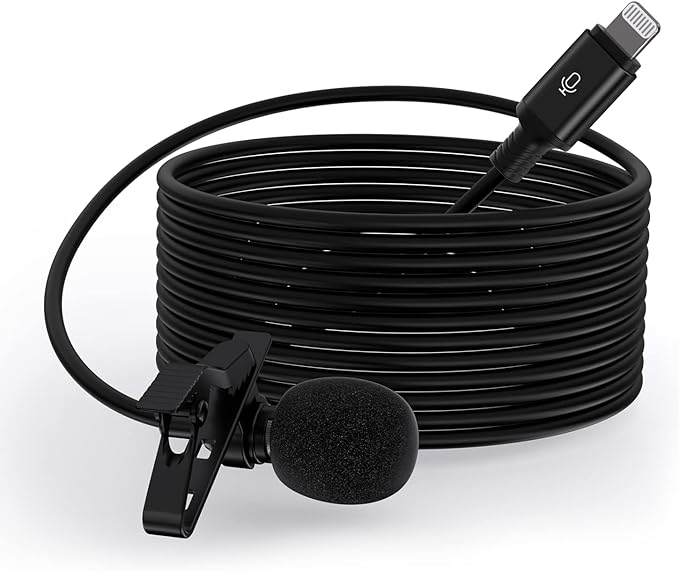
Microphone:
Use an external microphone for clear audio. This is another very important detail. Ensure there are no distracting noises in your recording space. Bad audio will label you as a rookie and reduce your chances of being considered for the role. A Lavalier mic clipped to your lapel or a shotgun mics over your head are good options. Having a mic on you will make you sound right and help you to not overproject. It will also help to make your reader be slightly muted, but still audible, and keep the focus on you. Iphones and Android phones require different mics. Make sure you get the right one!
Test Your Setup:
Record a few test shots to check lighting, sound, and framing. Transfer the files to your computer to make sure that your recording is playing correctly with the correct side up. Make sure your audio is at a comfortable level and not distorting. Make necessary adjustments based on the test footage.
Example Setup
Imagine a room with soft carpeting and heavy curtains to minimize sound echo. A neutral gray backdrop is hung against the wall. Three LED lights are set up: one in front as the key light, one on the side as the fill light and a small light behind for backlighting. A DSLR camera on a tripod is positioned at eye level, with a lavalier mic clipped to the actor’s shirt. The camera captures a well-framed medium close-up shot. Test recordings have been done to ensure everything looks and sounds perfect. The reader is placed just to the side of the camera.
4. Film Your Audition
Select a Reader
Now that you have your recording setup in place, it is time to coordinate someone to be your reader. You can ask a friend or family member to read the other character’s lines. This person should be audible but not overpowering. Their voice should be consistent with the tone of the scene. Your reader should stand right next to the camera and you should deliver your lines directly to them. It is very important that the actor is louder than the reader. This is why using a lapel microphone is essential. We will cover that in a bit.
Camera Framing
Typically self-tape auditions are shot in, a medium close-up (from the chest up) framing. The emotion and power in an audition is expressed in the face. Making sure we see your face well is important. Ensure the camera is at eye level to maintain proper framing.
Shooting a “Slate”
Before you record your audition, you need to record a short informational clip called a “slate.” In the previous lesson, we talked about “Slating” with a piece of paper and a verbal introduction. When doing a self-tape you typically don’t need to hold a paper slate in your hand. A verbal Slate is fine. Be sure to read the audition invitation thoroughly to make sure you include all the information that the casting director is requesting. Typically information can Include your name, agency (if applicable), where you live currently, age, height, union status or any other requested information. Be sure to speak clearly and confidently as yourself before starting your scene. You may be asked to submit your “Slate” in an individual video file or add it to your audition scene. Slates go at the beginning or end of your audition depending on the request.
Recording without a reader
It is quite possible that you need to get a self-tape recorded when you don’t have anyone to read with you. In that case, it is necessary to get creative. Using a script rehearsal app is a way to not only prepare for your audition, but you can use it during the audition. Record your lines and the lines of the other characters into the app. When you are recording your audition in front of the camera, use the playback function on your app to play the lines of other characters and not play back your lines. You say your lines in the gaps and now you have a self-tape with all the characters that you have done all by yourself.
Another option would be to have a reader connect with you over an online video chat. This way you will have a live reader without having them be physically present.
Camera rotation
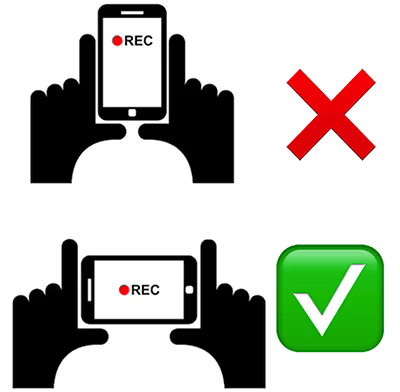
If using a cell phone to record, make sure you turn it in the Landscape position which is horizontal, not portrait which is vertical.
“ACTION!” – Shooting your scene
Now it’s time to record the scene(s), focusing on delivering a compelling performance. Be bold and confident with your interpretation of the scene and character. Maintain eye contact with your reader or a specific spot, as instructed in the audition notice.
Be mindful of your body language and facial expressions. Keep your movements within the frame. There is no need for any other characters to be seen in the audition. Just you!
One of the benefits to the Self-Tape audition is that you can record as many takes as you need to get the performance that you want. Pick your favorite take and move on to the next step!
5. Review and Edit
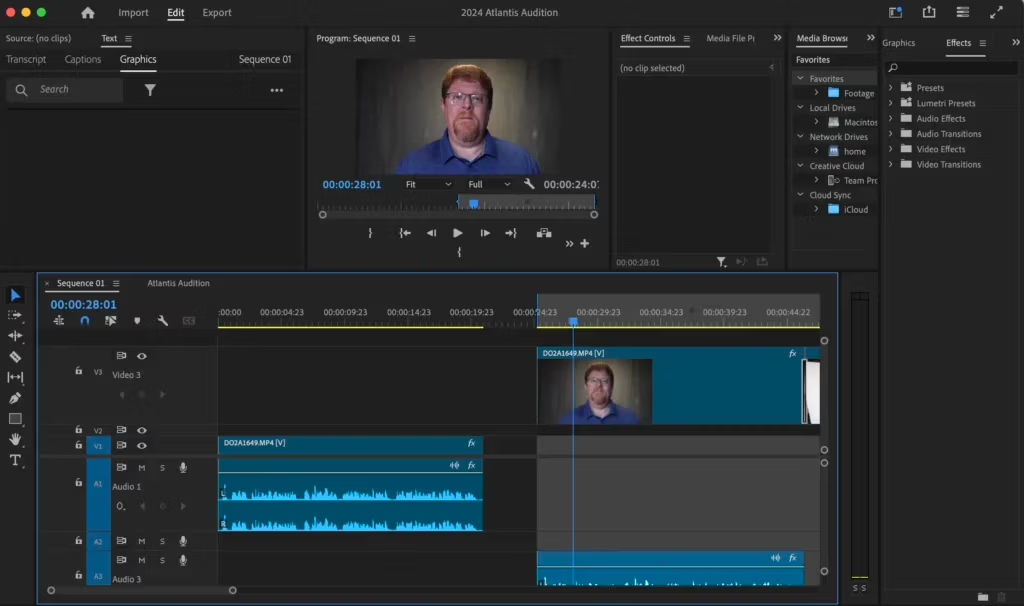
Video Editing Software:
Now that you have shot your audition, lets get it cleaned up and formated correctly. Install a video editing software on your computer or smartphone. Some free video editing software options are IMovie, DaVinci Resolve, Shotcut and OpenShot. Get familiar with the basic editing functions of the software by watching tutorials on your selected software.
Watch your takes to identify the best performance. Make sure there are no technical issues (e.g., lighting, audio, framing).
Edit the video if necessary to remove any outtakes, adjust volume, or correct lighting or color balance issues. However, don’t over-edit or add special effects. Make sure your selected take is a solid take without mistakes. Don’t make cuts in your video to cover up mistakes. It will be obvious that you couldn’t get a decent take and you will have less of a chance to land the part.
Make sure that your scenes don’t have any unnecessary footage before and after your scene. Clip them off before you render and export your file.
Video File Format:
After editing your video for content, and you feel comfortable with the audition, it is time to export your video and render it. You need to export your final file in a COMPRESSED video file so that it is small and easy to transmit and upload. The best format for this is H. 264 (MP4): This is a widely supported format that offers excellent compression without significant quality loss. H. 265 (HEVC): An even more efficient format that provides high compression while maintaining good quality.
6. Submit the Self-Tape
Follow the submission instructions EXACTLY. Casting directors get really irritated when they get submissions that don’t follow the directions that they have given. They may ask for each scene to be submitted in an individual video file or edit them all together as one. Find out how they want the SLATE submitted. They might want it submitted separately or in the audition it self. If no instruction is given, put it at the end of the audition. This is called a tail slate.
How you will get the files to them might involve uploading the file to a specific platform, sending it via email, or using a file-sharing service. If you are sending the file to an email address, use a service called WeTransfer. www.WeTransfer.com This is a free service that allows you to send files up to 2GB for free.
When naming the files, be sure to use the required file format and naming convention that they are requesting in the audition invitation. If none is given, name your files in the following way with your name, project, character.
John Smith – Film Name – Harry Butts
Always get to recording and submitting your audition as soon as possible. Ensure you meet the deadline. Aim to submit your self-tape with time to spare in case of technical issues.
7. Follow Up and Prepare for the Next Steps
Congratulation on getting your audition submitted. After submission, wait for feedback or further instructions. Be patient; casting processes can take time. This is what actors do. We audition! Now, FORGET IT! Don’t spend any mental energy thinking about any further. You will torture yourself wondering if you could have done it better or a million other things. Just FORGET IT and go onto to your next audition.
Continue preparing for future auditions, and maintain your skills through practice, workshops, or other activities. Self-tape auditions require careful planning and attention to detail, but they offer actors flexibility and opportunities to audition for a wider range of roles. Keep auditioning and polishing your craft!
If you have questions about self-tape auditions that have not been covered, send us your question in an email and we will do our best to update the content and notify you. Send your email to FinalActDrama@Gmail.com.
CUSTOMER TESTIMONIAL
What others are saying about the Acting for Film and TV: Fundamentals Course!
"After my first session of classes I was already landing roles and steadily booking jobs." With Final Act Drama you get all the tools you need to be successful in this amazing industry. After my first session of classes I was already landing roles and steadily booking jobs. I'm so thankful to have such an incredible program be affordable and attainable. Sign up now and start working to make your dreams a reality!